Schedule a livestream on facebook

Facebook is currently the largest social network, allowing users to share photos, post classified ads, interact with friends and quickly update current events. This platform also provides the opportunity to access real images and interact directly with viewers. Follow the article below by RentFB to discover the simplest way to schedule a livestream on facebook.
Why do we need to schedule a livestream on Facebook?
Scheduling a livestream on Facebook offers a number of important benefits for users and businesses, especially when they want to maximize the effectiveness of their live streams. Scheduling a livestream allows viewers to know the time and date of the event in advance, so they can schedule their time to attend and not miss out on important content. This not only increases participation, but also enhances audience engagement and engagement. Scheduling a livestream also helps build anticipation and excitement among followers. When events are announced in advance, viewers have time to prepare, share information with friends, and remind interested people. This can lead to higher viewership and more active engagement during the livestream.
Additionally, scheduling your live stream helps you be more prepared both technically and content-wise. You can plan your show, ensuring that all your equipment and technology are working properly before the broadcast. This helps minimize the risk of technical issues and ensures that your live stream runs smoothly. Scheduling your live stream also provides valuable information about the optimal time to broadcast, based on your audience’s habits and activity. This helps you optimize your broadcast time to achieve the best reach and engagement with your audience.

How to schedule a livestream on facebook most effectively?
Scheduling a live stream on Facebook Live helps you prepare and host your live broadcasts more professionally. Here are the detailed steps to do this:
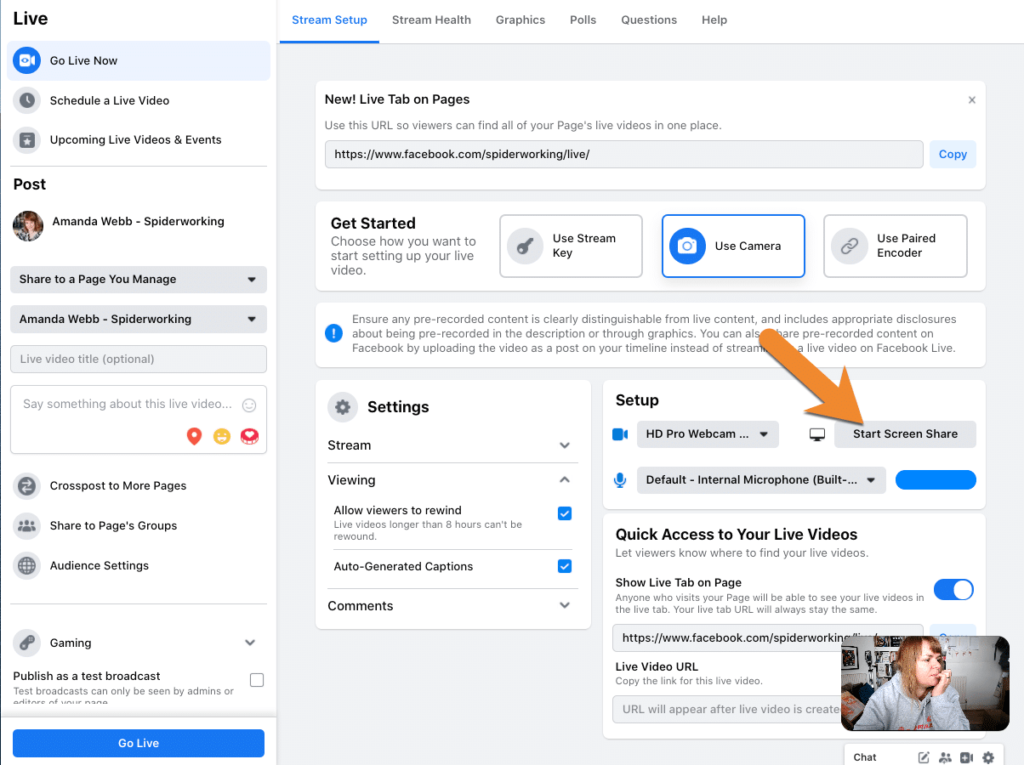
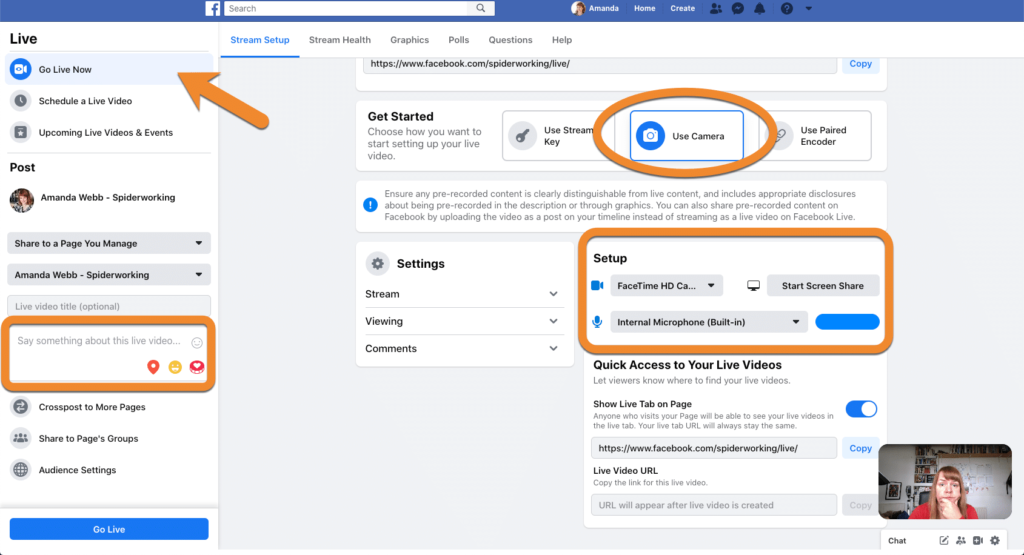
- Step 1: To get started, you’ll need to go to your Facebook Live Producer page. This is where you can manage and schedule your live videos.
- Step 2: In Live Producer, you’ll see the option to “Choose where to post.” Click on it and select the page or group where you want to post your live video. Make sure you’ve selected the correct location where your video will be broadcast.
- Step 3: Click “Select” on the Live tab to go to your video settings. This is where you’ll configure the details for your live broadcast.
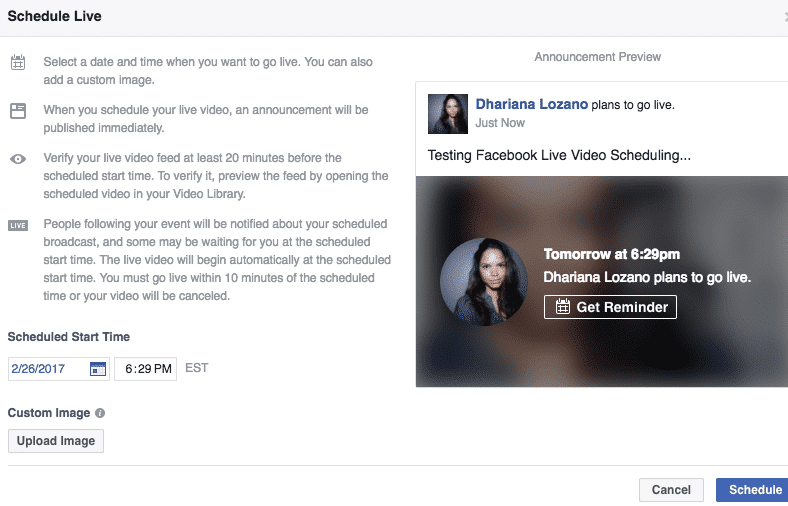
- Step 4: In the left menu of your Live Producer dashboard, find “When will you go live?” and select “Later” from the drop-down menu. This allows you to schedule your live video instead of going live right away.
- Step 5: After selecting “Later,” you’ll have the option to select a specific date and time for your video. Click on the drop-down menu to select a date and time that fits your schedule.
- Step 6: After setting up your live broadcast time, you can continue to configure other settings for your video, such as title, description, and additional options.
- Step 7: Once you’ve completed all the settings and are ready to go live, select “Schedule Live Video” to confirm your schedule.
Note that when you schedule a livestream in Live Producer, your audience won’t be notified about the event. The video will appear in your Facebook feed when the livestream starts. If you want to notify your audience about the livestream, you can create a Facebook live event to ensure that all your followers are notified and prepared for the livestream.

How to launch a scheduled livestream on Facebook Live?
Here are the detailed steps to schedule a live video on Facebook Live, helping you prepare and manage your livestream effectively:
Step 1: First, you need to open Live Producer on Facebook. This is a powerful tool from Facebook that allows you to manage and schedule your live streams. You can access Live Producer through your Facebook page, which will start the process of scheduling your live stream.
Step 2: Once you are in Live Producer, you will see an option called “Choose where to post.” This is an important step to decide where your live stream will be broadcast. You can choose to post your live stream on your personal page, a page that you manage, or in a Facebook group. Make sure you choose the right place where you want to share your live stream to reach your target audience most effectively.
Step 3: Next, you’ll need to click “Select” on the Live Stream tab to move to the Live stream settings. This is where you’ll configure the details of your broadcast. Here, you can give your Live stream a title, write a brief description of what you’ll be streaming, and select other options related to your Live stream.
Step 4: On the left menu of your Live Producer dashboard, you’ll find “When will you go live?” Select “Later” from the drop-down menu. This option allows you to schedule your Live stream for a specific time in the future, instead of going live right away.
Step 5: After selecting “Later,” a drop-down menu will appear that allows you to select a specific date and time for your Live stream. Choose a time that fits your schedule and make sure that the time selected is ideal for reaching your target audience.
Step 6: Once you have set the livestream time, you can continue to configure other settings such as the title, description, thumbnail, and any additional options you want to apply to your broadcast. This is an important step to ensure that your livestream will attract attention and convey the right message to viewers.
Step 7: Once you have completed all the setup steps, click “Schedule a livestream” to confirm your schedule. After clicking this button, your livestream will be scheduled and you can prepare for the livestream without worrying about forgetting the broadcast time.
Following these steps, you will be able to schedule and host livestreams on Facebook in a professional and effective way.
So you have completed the steps to schedule and launch livestreams on Facebook Live. Let’s interact and share the moment with your friends right now. If you have any questions, don’t forget to leave a comment!
Contact Info
We provide services facebook ads casino nationwide, and with a team of experienced and qualified staff who both support advertising and can directly perform Facebook advertising if you need. Contact us via phone number.
Frequently Asked Questions
Will the livestream be deleted after 30 days?
Facebook Livestreams are automatically deleted 30 days after the livestream ends. This means that if you want to save the content or share the livestream later, you will need to download or archive the video before this period expires. After 30 days, the livestream video will no longer exist on the platform and cannot be recovered.
How to keep livestream videos on Facebook?
To keep your Facebook livestream video, you’ll need to download it to your device or save it to your account. After your live stream ends, Facebook will give you the option to “Save” or “Download.” You can choose to save the video to the Videos section of your profile, page, or group so others can watch it later. If you want to keep the video for later use, download it to your device for safekeeping.