How to create Sponsored Ads on Facebook

Are you wondering how to run effective Facebook ads and increase orders? How to create sponsored ads on Facebook? These questions are often asked by beginners selling on this platform. Don’t worry, Rentfb will help you answer these questions through detailed step-by-step instructions right in today’s article.
A few things to know about ads labeled “sponsored” on Facebook
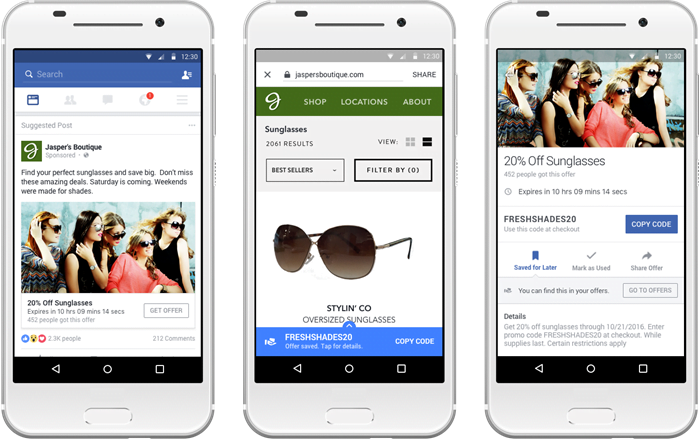
Sponsored Stories, also known as sponsored ads, is a form of advertising on Facebook designed to increase awareness and interaction with content from fanpages. This ad format can appear in two main positions: on the right side of the Newsfeed or in the middle of the Newsfeed, to effectively attract users’ attention. Sponsored ads usually include a visual image combined with a description line. This description line is automatically taken by Facebook from fanpage posts or from information that has been updated on the fanpage. This makes the ad easy to understand and attached to the original content of the fanpage, thereby creating a strong connection with the target audience.
One of the strengths of Sponsored Stories is the direct interaction it provides. Users can easily perform actions such as liking, commenting or sharing right on the ad. This not only helps increase engagement with the content but also encourages users to explore more posts or other information on the fanpage. When users click on the ad, they will be directed to that specific fanpage or post, increasing traffic and engagement levels of the fanpage naturally.
With diverse display capabilities and direct interaction features, Sponsored Stories is a powerful advertising tool that helps businesses and individuals increase their online presence and build strong relationships with their target audience.

How to Create Sponsored Ads on Facebook
Nowadays, running your own ads on Facebook is no longer strange to many people. With just a Facebook account and an international Visa card, you can easily set up and manage advertising campaigns for your brand. If you do it right, you will not only save costs but also have better control over advertising goals, thereby improving campaign effectiveness. Here are the detailed steps for you to run Facebook ads effectively:
Step 1: Create an advertising campaign
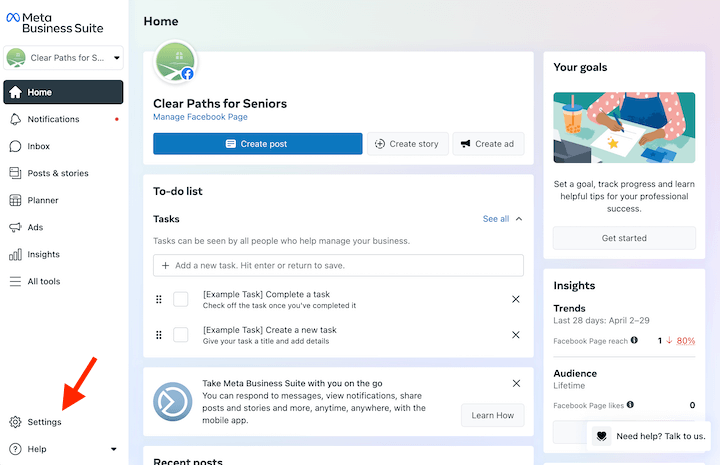
To get started, you can click the “Boost Post” button below a post or “Boost Event” if you want to promote a Facebook event. Alternatively, you can visit the Facebook ad creation page to start promoting an existing post or create a new post. Here, click the “Create Ad” button on the menu bar to go to Ads Manager, where you can manage your ads.
Depending on your advertising goal – whether it’s raising brand awareness, boosting post engagement, or increasing conversions – you’ll want to select an appropriate objective under “What’s your marketing goal?” Once you’ve selected your objective, scroll down, enter a campaign name, and click “Set up an ad account” to create your Facebook ad account. You can also set a spending limit for your campaign by clicking “Set limit” at the bottom of the page.
Step 2: Create a Facebook advertising account
If this is your first time running ads on Facebook, you’ll need to set up your ad account by entering information like your country, currency, and time zone. You can change your ad account name by clicking “Show advanced settings.” Once you’re done, click the “Continue” button.

Step 3: Target your ad
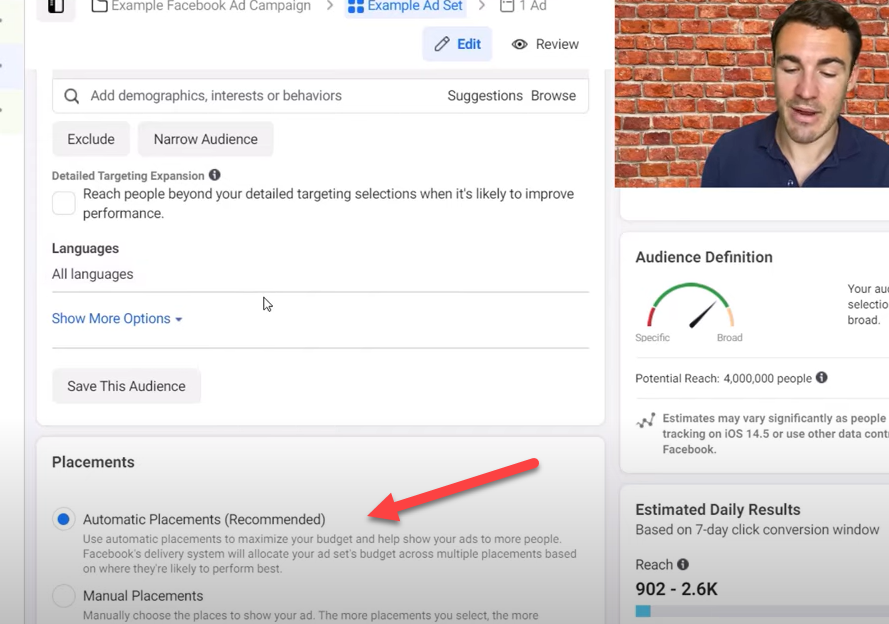
In this step, you’ll name your ad group and customize the information to match your target audience. This is an important step to ensure your ads are shown to the right people. Based on your plan and industry, target specifically by factors such as location, age, gender, language, relationships, education, interests, and behaviors.
Identifying your target audience more precisely will help improve advertising effectiveness and reduce costs. Facebook will display an estimated number of potential customers based on the information you have selected through the chart on the right side of the page.
Step 4: Choose advertising location
Next, you’ll need to choose where your ads will appear. You have two options: “Automatic Placements” and “Edit Placements.” With “Automatic Placements,” Facebook will show your ads in the most optimal places, including Instagram and Audience Network. If you choose “Edit Placements,” you can customize where your ads appear by device type (all devices, mobile only, or desktop only) and platform (Facebook, Instagram, Audience Network, or Messenger).
Step 5: Set up your advertising budget
Next, you’ll set your ad budget and schedule. You can choose either a “Daily Budget” or a “Lifetime Budget.” With a “Daily Budget,” Facebook will distribute your daily budget based on your spending, which can fluctuate from day to day. With a “Lifetime Budget,” you set a total budget for your entire campaign. Then, set your ad schedule, choosing between “Run Continuously Today” or “Set Start and End Dates” for a daily budget, or setting a start and end date for a lifetime budget.
Step 6: Preview and confirm your ad
You will select the fan page and post you want to promote, and preview the ad on different devices such as mobile and computer. You can select the post or enter the post ID to promote. If you want to create a new promoted post, click “Create New Ad” to upload a photo, video or slideshow, write the ad content and add a CTA button.
When you’re done, click the “Review” button to review your campaign overview or make changes if needed. When you’re sure, click the “Confirm” button. If you haven’t created an ad account yet, Facebook will ask you to provide your full payment information before finalizing.
You just need to wait for Facebook to approve your ad, which usually takes about 24 hours. Your ad will automatically start running when Facebook sends you a successful approval notification. If your campaign isn’t performing as expected, you can delete or turn off your ad at any time.
Here is a detailed guide on how to run Facebook ads effectively and cost-effectively. With these steps, you can create your own sponsored ads on Facebook and enjoy great results in increasing your sales!
Contact Info
We provide services dropship facebook nationwide, and with a team of experienced and qualified staff who both support advertising and can directly perform Facebook advertising if you need. Contact us via phone number.
Frequently Asked Questions
Để tạo quảng cáo trên Facebook, đầu tiên bạn cần truy cập vào Trình quản lý quảng cáo và chọn mục “Tạo quảng cáo.” Tiếp theo, xác định mục tiêu quảng cáo của bạn, như tăng lượng truy cập trang web hoặc tăng nhận thức về thương hiệu. Sau đó, thiết lập đối tượng mục tiêu dựa trên các yếu tố như độ tuổi, giới tính, và sở thích. Lựa chọn vị trí hiển thị quảng cáo, đặt ngân sách và lịch trình. Cuối cùng, tạo nội dung quảng cáo, bao gồm hình ảnh, video, và văn bản, rồi xem trước và xác nhận quảng cáo của bạn trước khi chính thức chạy.
Quảng cáo bài viết trên trang cá nhân là cách hiệu quả để gia tăng độ tiếp cận và tương tác với nội dung của bạn trên Facebook. Bạn có thể thực hiện quảng cáo bài viết bằng cách chọn nút “Quảng cáo bài viết” dưới bài viết cụ thể trên trang cá nhân của mình. Quá trình này cho phép bạn thiết lập mục tiêu quảng cáo, chọn đối tượng mục tiêu, và xác định ngân sách để bài viết của bạn tiếp cận đến nhiều người dùng hơn. Đây là một cách đơn giản và trực tiếp để nâng cao sự hiện diện của bài viết và thu hút sự chú ý từ những người có thể quan tâm đến nội dung của bạn.