How to create an instant experience ad on facebook

Instant experience in Facebook advertising is to give users a quick and easy feeling when they hear, see, interact or learn information. When users have a need and click on the ad, this experience helps them quickly access the necessary information. This is often called quick experience, done by creating a landing page with full important information right on their mobile device. In today’s article, RentFB will share with you details on how to create an instant experience ad on facebook.
What is Facebook Instant Experience Ads?
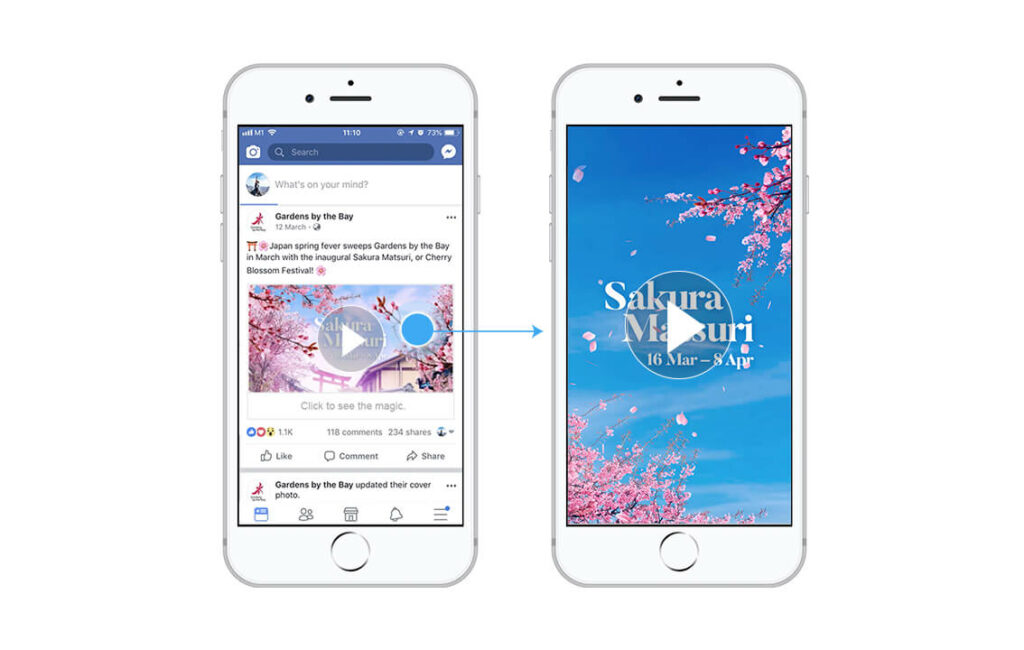
Instant Experience is a new feature that has been added to help advertisers reach users more effectively. This feature allows customers to quickly and easily view a product or service, as well as contact the provider directly through a landing page that is displayed immediately after the user clicks on the ad. This not only enhances the interaction between consumers and advertisers, but also facilitates the conversion from viewer to customer. Instant Experience is well suited to many ad formats on Facebook, including image, video, carousel, and slideshow ads. Advertisers can choose from available templates according to their usage purposes or create their own templates, meeting the needs and style of the brand. However, one thing to note is that the Instant Experience feature is only available and effective on mobile devices, helping to optimize the user experience when they access the ad from their phone.
In image, video, carousel, and slideshow ad formats, the use of instant experiences is optional. Ad creators can decide whether to opt in to this feature, depending on their advertising strategy. However, for collection ad formats, the integration of instant experiences is mandatory. This ensures that users have a more seamless and immersive experience when exploring the advertised products or services, thereby increasing the chances of conversion for advertisers.

How to create an instant experience ad on facebook
Before you get started creating your Instant Experience, there are a few important steps you need to take:
- Identify the goals you want to achieve with your Instant Experience. This will help you shape what and how you deliver your message to your target audience.
- Make sure you have the content assets like images, videos, and text that you want to use in your Instant Experience ready. These assets will help create an engaging and engaging experience for users.
- If you don’t have a lot of time to design from scratch, consider using ready-made templates. This will save you time and effort when creating your Instant Experience.
- Research how Instant Experiences can capture user attention and drive engagement. This will help you optimize your content and design.

You can create Instant Experience ads from Ads Manager or from your Facebook Page. Here are detailed instructions for creating an Instant Experience template:
- Step 1: Open Facebook Ads Manager.
- Step 2: Find the “Create Ad” button and click on it to start the process of creating a new ad.
- Step 3: Choose a suitable objective like “Traffic” or “Conversions”. Then, name your campaign and click “Continue”.
- Step 4: Determine the target audience you want to target, the ad placement, budget, and schedule for your ad.
- Step 5: Once you have completed the settings, click “Continue” to move to the next step.
- Step 6: Select the ad format you want to use. Note that the ad format you choose will determine which templates are available. If you choose the collection format, you’ll automatically select Full-screen Instant Experience and can skip the next step.
- Step 7: Check the box “Add Full Screen Instant Experience”.
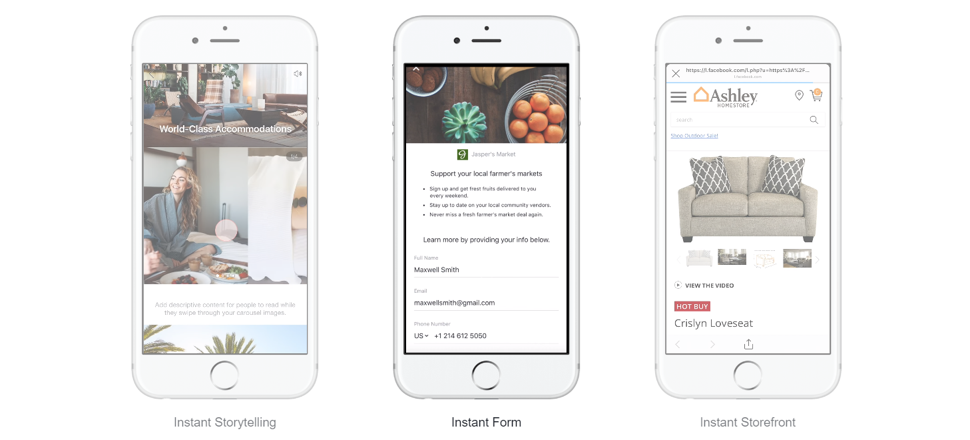
- Step 8: Under the “Create New” tab, you will see three templates. Hover over the template you want to create and click “Use Template”.
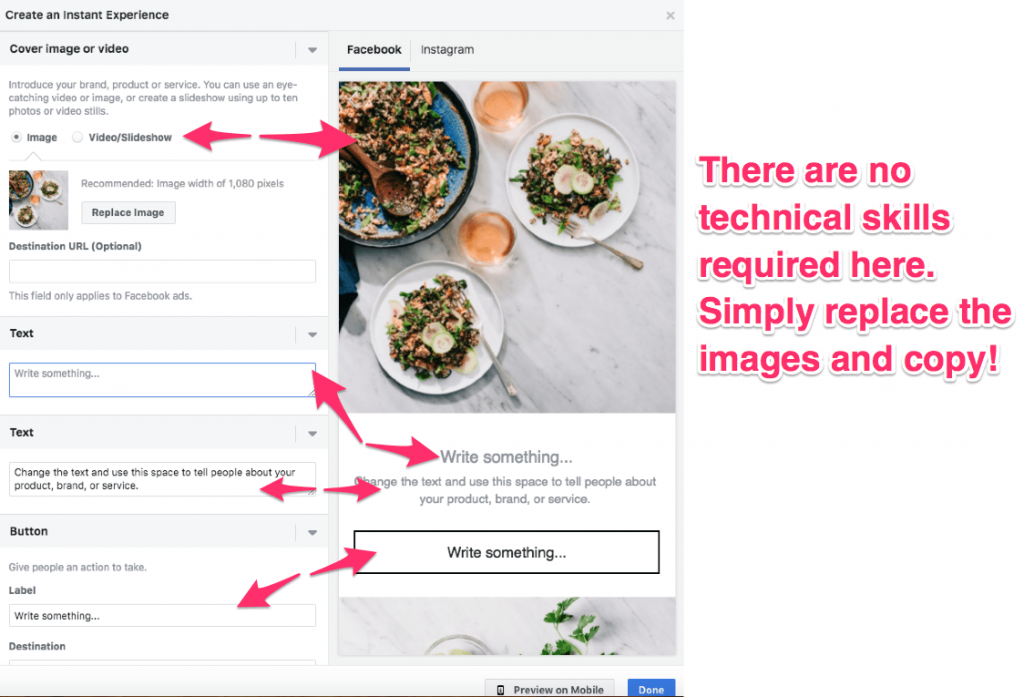
- Step 9: Add images, videos, text, and destination URLs to the template as shown in the tutorial. Make sure your content conveys the right message and engages users.
- Step 10: To preview how your Instant Experience will look on mobile, click “Preview on mobile.”
- Step 11: Once done, you can click “Done” to close the Instant Experience form builder.
- Step 12: Once you have completed all the steps, click “Place Order” to submit your ad.
Guide to Creating Custom Instant Experiences
To optimize your Facebook advertising performance, creating a customized Instant Experience is essential. Here are the detailed steps to help you do this easily.
- Step 1: Go to Facebook Ads Manager. From the Facebook main page, find and click the “Ads” icon to get started.
- Step 2: In the Ads Manager interface, look for a tab or section called “Ads”. Click on it to go to the section to create a new ad.
- Step 3: Once you’re in the Ads section, look for the “+Create” button to begin the process of creating a new ad. This button is usually located in the upper right corner of the screen.
- Step 4: Here, you will need to choose an appropriate objective that supports your Instant Experience. Some popular choices are “Traffic” or “Conversions”. Once you have selected your objective, name your campaign and click “Continue” to move forward with the process.
- Step 5: Next, you will need to define the audience you want to target, set a budget for your ad, and set a schedule for it. This will help you optimize your ad to reach the right consumers. Once you have completed these settings, click “Continue.”
- Step 6: At this point, you’ll need to choose the ad format you want to use. Your options include carousel, single image, single video, slideshow, or collection. Note that if you choose the collection format, a full-screen Instant Experience will be automatically selected and you can skip the next step.
- Step 7: Check the box “Add Instant Experience” to enable this feature for your ads. This will allow you to create a more interactive experience for users.
- Step 8: Next, click “Create Custom Instant Experience” to start building content for your Instant Experience.
- Step 9: In the Instant Experience builder, you’ll see an “Add Components” option. Click on it to add the pieces of content you want to include in this experience.
- Step 10: Now, name your Instant Experience. You will also need to select the elements you want to add, such as images, videos, text, or links. Make sure that all of these elements will fit the mobile screen ratio.
- Step 11: Once you’re done selecting components and setting up, click “Save” to save your Instant Experience.
- Step 12: If you want to preview or show others your Instant Experience, click “Preview” or “Share.” This helps you make sure everything is perfect before your ad goes live.
- Step 13: Once you’re satisfied with your Instant Experience, click “Finish” to complete the ad creation process.
Facebook Instant Experiences ads are a powerful tool for businesses to reach customers quickly and interact effectively. With simple setup steps, you can create intuitive, engaging experiences right on mobile devices, increasing the ability to attract and convert customers. Apply now to optimize your advertising campaign!
Contact Info
Information about “how to create an instant experience ad on facebook” hopes to provide you with additional necessary knowledge. At Rent FB, there is a team of highly qualified and experienced staff and experts who will provide facebook agency ad account rent as well as support when you run Facebook ads. Contact us via phone number.
Frequently Asked Questions
To add an existing Custom Instant Experience to your ad, you’ll need to go to Ads Manager and select the campaign you want. Once you’ve selected your ad format, check the box next to “Add an Instant Experience.” Next, under “Use an Instant Experience you’ve already created,” you’ll see a list of previously saved custom experiences. Select the right experience, preview it if necessary to make sure it looks right, and then complete the setup by clicking “Save” and “Place Order.” Reusing experiences you’ve already created saves time and keeps your ad campaigns consistent.
To edit the name of an Instant Experience ad element, simply go to the ad creation or editing tool in Ads Manager. Here, click Add Element or select the element you want to edit. Then, enter a new name for the element as desired and click Save to update. This helps you manage and organize your ad elements in a clear, easy-to-follow way, ensuring that the content displayed aligns with your campaign goals.