How to create ad account for business page

The term Facebook Business Manager or business advertising account is currently being mentioned quite commonly in the Facebook Ads market in Vietnam. So what benefits does this account bring to Facebook Ads users? Let’s find out with RentFB about the most effective how to create ad account for business page!
Learn about advertising accounts for business pages
Business advertising accounts are an important platform that helps users effectively manage information related to advertising campaigns on Facebook. This platform, commonly known as Facebook Business Manager, allows you to manage multiple advertising accounts and multiple fanpages at the same time. This makes it easy for you to control and optimize advertising activities, from setting up campaigns to allocating budgets. By using Business Manager, you can organize campaigns in a reasonable way, ensuring effectiveness in the marketing process with Facebook Ads. One of the biggest benefits of Business Manager is the ability to support the management of multiple advertising accounts, helping businesses and marketers easily monitor and adjust strategies for each specific campaign. In addition, the system also provides comprehensive budget management tools, helping you allocate resources reasonably between different campaigns. This not only saves time but also optimizes advertising effectiveness, thereby bringing higher return on investment.
When using a Business Manager account, you will often encounter terms such as BM1, BM5, BM350, BM1500, BM2500. These are classification codes, indicating the number of advertising accounts you can create on your admin account. For example, with BM1, you can only create one advertising account, while with BM350, you can create up to 350 accounts. This is very useful for businesses that need to deploy multiple advertising campaigns at the same time or for advertising agencies that need to manage multiple clients. Initially, when you create a new Business Manager account, it will default to level BM1, which means that it only allows the creation of a single advertising account. However, as you start deploying ads and spending more money on campaigns, Facebook will gradually upgrade your account, expanding the limit on the number of advertising accounts you can create. For instance, once you have spent a large enough amount of money, you can be upgraded to BM5 or even higher, like BM7, BM350, depending on the amount spent and how long you have been active on the platform.

The value of a Business Manager account is not only determined by the number of ad accounts it can create, but also by its advertising performance and campaign management capabilities. The more ad accounts you have, the more valuable your Business Manager becomes. This gives you the flexibility to adjust your strategy, optimize your ads, and grow your business in Facebook’s increasingly competitive environment.
How to create ad account for business page
Before you begin, you need to prepare a genuine Facebook account that has been used for at least 6 months and, if possible, has run ads before. Using an account that has a history of running ads will increase the success rate when creating a business advertising account. If you have never used a genuine Facebook account, you can also buy a verified via account to ensure a smoother account creation.

Step 1: Access the business advertising account creation page
First, visit the following link to begin the process of creating a business advertising account:
Link: Facebook Business Manager
This is where you can create and manage your business advertising account.
Step 2: Fill in information to create a BM account
After entering the Business Manager page, you need to click on the “CREATE ACCOUNT” button in the right corner of the screen. At this point, you will be asked to enter information to name the Business Manager (BM) account. Next, prepare a clean Gmail account, never used for Facebook, to serve the purpose of account verification.
Step 3: Confirm with Facebook via email
Once you have filled in the required information, Facebook will send a verification email to the Gmail address you just entered. Open the email and click the “VERIFY NOW” button to complete the basic account creation process. This ensures that your account is properly verified before proceeding.
Step 4: Fill in business information
Once verified, you’ll need to fill in your business information under “BUSINESS INFORMATION”. This is an important step to let Facebook know you’re operating as a legitimate business.
- Case 1: If you have a legally registered business, just fill in all the required information and you’re done.
- Case 2: If you don’t have a business, don’t worry. You can still create an account by entering information from any business or address on Google Maps in countries like the US, Korea, or Japan.
Note: The business you choose must have a complete address, phone number, and a 3-star or higher rating on Google. This increases the likelihood of your account being accepted by Facebook.
Step 5: Create an advertising account
Once you have completed your business information, you will move on to creating an advertising account. Follow these steps:
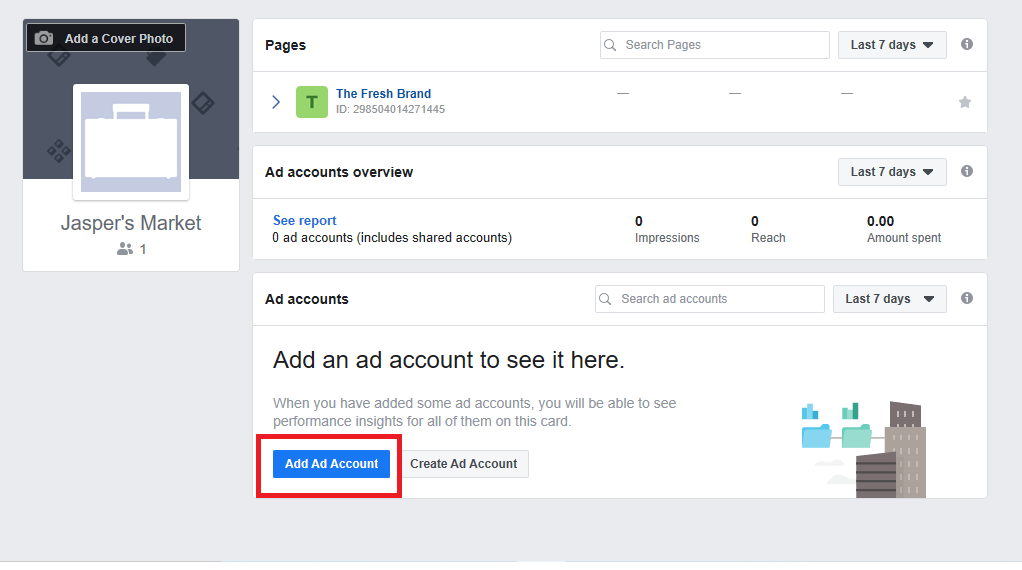
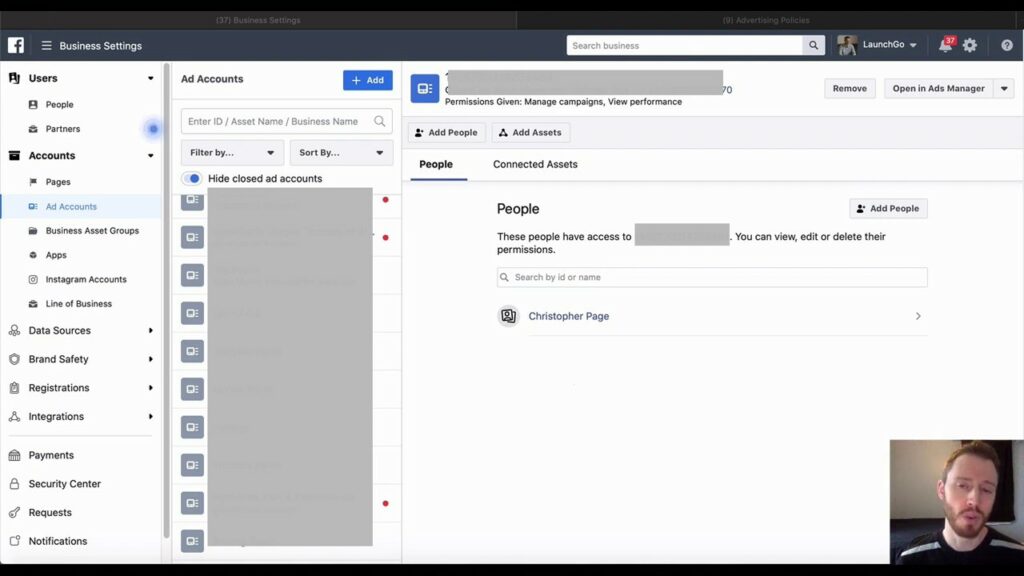
- Select “ACCOUNT” -> “ADS ACCOUNT” -> “ADD” -> “CREATE NEW ADS ACCOUNT”.
Important note: You need to choose the correct currency that matches the type of Visa card you use to pay for advertising. This is very important to avoid unexpected problems during the payment process. Then, select your personal Facebook account and select “MANAGE ADVERTISING ACCOUNT” to open full management rights. In addition, you can also add multiple Facebook accounts to ensure that if one account is locked, you still have management rights through another account. Finally, F5 (refresh) the page and select “AUTHORITY” to check if your business advertising account has opened a customer list.
Result
- If your account is unlocked, congratulations! You have successfully created a fully functional business advertising account.
- If it hasn’t been opened yet, don’t worry. Facebook will review it within 24 to 72 hours. If your Facebook account has run personal ads before, the opening rate is very high.
We have guided you on how to create a business advertising account and explained its functions clearly. Hopefully this information will help you increase product sales more effectively. Wish you success!
Contact Info
Information about “How to create ad account for business page” hopes to provide you with additional necessary knowledge. At Rent FB, there is a team of highly qualified and experienced staff and experts who will provide facebook account for ads as well as support when you run Facebook ads. Contact us via phone number.
Frequently Asked Questions
Tài khoản quảng cáo cá nhân và doanh nghiệp là hai loại hình quản lý quảng cáo trên Facebook với những chức năng khác nhau. Tài khoản quảng cáo cá nhân được sử dụng bởi người dùng cá nhân để quản lý các chiến dịch quảng cáo nhỏ, thường chỉ gắn liền với một người và có giới hạn về số lượng tài khoản quảng cáo. Trong khi đó, tài khoản quảng cáo doanh nghiệp (Facebook Business Manager) cho phép doanh nghiệp quản lý nhiều tài khoản quảng cáo và fanpage cùng lúc, giúp theo dõi hiệu quả quảng cáo, quản lý ngân sách và phân công vai trò cho nhiều người trong đội ngũ. Điều này giúp doanh nghiệp tối ưu hóa các chiến dịch quảng cáo và tiếp cận đối tượng mục tiêu hiệu quả hơn.
Thêm tài khoản quảng cáo Facebook là bước quan trọng giúp bạn quản lý và chạy nhiều chiến dịch quảng cáo hiệu quả hơn. Bạn có thể dễ dàng thêm tài khoản mới thông qua Facebook Business Manager bằng cách truy cập vào mục “Tài khoản quảng cáo” và chọn “Thêm”. Sau đó, bạn điền thông tin cần thiết và xác minh tài khoản để bắt đầu quản lý các chiến dịch. Việc này giúp bạn phân bổ ngân sách hợp lý, theo dõi hiệu quả quảng cáo và mở rộng quy mô kinh doanh một cách chuyên nghiệp