How to add Facebook pixel to website
Many Facebook Marketers often hesitate to install Facebook Pixel for their website because they think it is too complicated and requires knowledge of web programming. Although installing Facebook Pixel is technical, it is not too difficult to do and you should do it because Pixel brings many benefits. To have an effective Facebook advertising campaign, do not forget Facebook Pixel. This is an important tool to help you create more effective Audiences, run dynamic ads, track and optimize conversions. In this article, RentFB will help you learn how to add Facebook pixel to your website!
Instructions for getting Facebook Pixel code to install on website
Before you proceed to install Facebook Pixel, it is important that you know how to get your Pixel code. To do this, you can refer to the following steps:
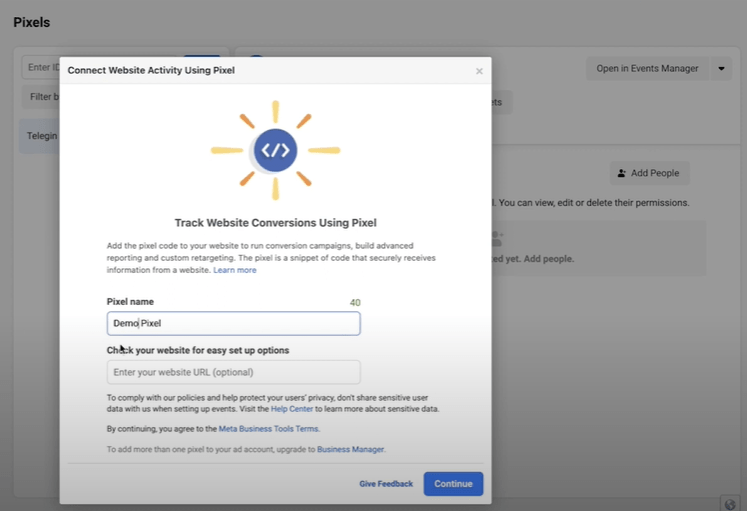
Step 1: You need to access the Facebook Pixel section in your Business Manager. If this is your first time installing Pixel, you will see the interface as illustrated, and you just need to click the “Set Up Pixel” button.
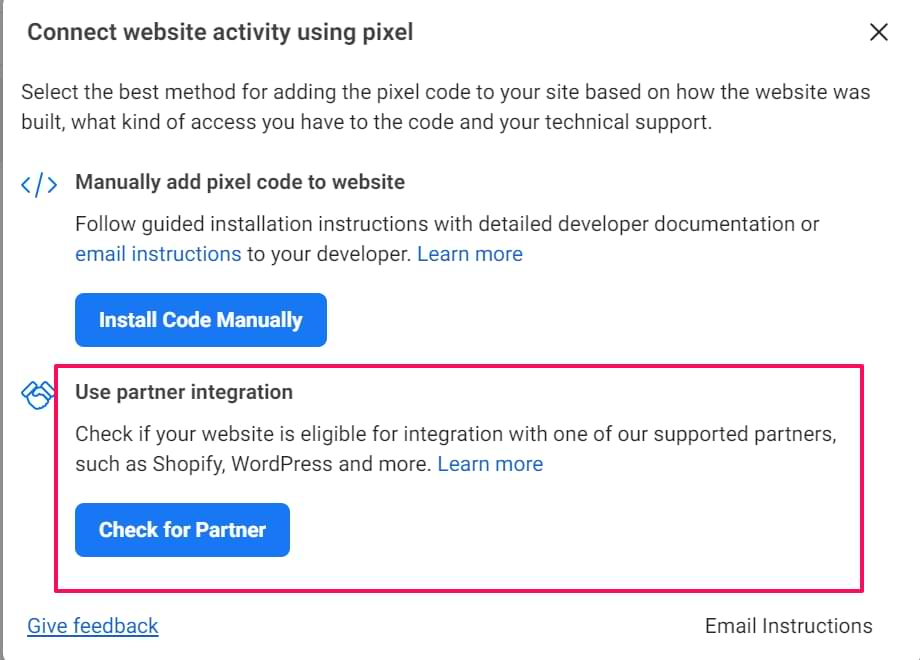
Step 2: In the “Choose How You Want to Install Your Pixel Code” section, you will have two options: one is to install through another tool like Tag Manager, and the other is to install directly on your website. In this article, we just need to get and install the Pixel code directly, so you choose the “Copy and Paste the Code” option.
Step 3: Once you have selected it, continue to follow the instructions and go to step 1.2. Here, you will see your Facebook Pixel code. The Pixel code will be displayed as a code snippet consisting of lines of code that you need to paste into your website. At this point, you will notice a unique Pixel ID for your ad account, and this code will be displayed as two lines of blue numbers.
Step 4: You just need to copy the entire Facebook Pixel code and prepare to paste it into the source code of the website or tool you are using. Make sure that you have copied the entire code correctly to avoid errors during the installation process. After getting the Pixel code, you are ready to continue with the next steps in integrating the Pixel into your website.

How to add Facebook pixel to website simply
There are two common methods for installing Facebook Pixel on your website: installing it directly into your WordPress theme or using a plugin to manage the installation. Here are the detailed steps for each method:
Method 1: Go to WordPress Theme to install Facebook Pixel
Assuming you are running your website on WordPress, the easiest way to install the Pixel is to insert the code into the header of your website theme. The Pixel code must be placed before the closing tag </head> to ensure that it will work on all pages of your website. To do this, follow these steps:
- Step 1: In your WordPress dashboard, go to Appearance and select Theme Editor.
- Step 2: Find and open your current theme’s header.php file. This file contains the HTML code for the top of your website.
- Step 3: In the header.php file, you need to paste the Pixel code before the closing tag
</head>. You’ve copied the Facebook Pixel code from Business Manager, now just paste it here. - Step 4: After pasting the code in the correct location, click the Save button to complete the process.
This will allow you to install the Pixel across your entire site and track data from all pages on your site. However, if your theme is structured differently or you’re not comfortable editing source code, you may want to consult your theme’s documentation or ask a developer for help to ensure proper installation.

Method 2: Install Facebook Pixel in WordPress Plugin
In addition to installing directly into the theme, you can also use supporting plugins to easily add Facebook Pixel to your WordPress website. This not only simplifies the installation process but also provides many additional features to manage Pixel more effectively. Here are some popular plugins to install Pixel:
- Pixel Caffeine (Free): This is a free plugin that helps you install and manage Facebook Pixel on your website. After installing this plugin, you just need to enter your Pixel ID in the plugin settings and it will automatically insert the Pixel code into all pages of your website.
- PixelYourSite Pro (Around $80): This is a paid plugin that offers advanced features for managing Pixels on your website. This plugin allows you to easily install Pixels, track events, and set up custom conversions for Facebook ads.
- Tracking Code Manager (Free): This plugin also makes it easy to insert Pixel code into your website pages without having to edit the source code. Just install it and paste the Pixel code into the plugin settings.
After installing and activating one of the above plugins, you will have an easy-to-use interface to configure Facebook Pixel, paste the Pixel code, and track events and conversions from your ad campaigns. In particular, these plugins support many advanced features that help you easily manage audiences, track conversions, and optimize ad campaigns.
Both methods of installing Facebook Pixel on WordPress websites have their own advantages. Installing directly into the theme gives you full control and applies to all pages, while using a plugin saves you time and makes it easy to manage Pixel without having to manipulate the website’s source code. Depending on your needs and skills, choose the appropriate method to optimize the tracking and management of Facebook advertising campaigns. Good luck!
Contact Info
We provide services facebook dropship ads nationwide, and with a team of experienced and qualified staff who both support advertising and can directly perform Facebook advertising if you need. Contact us via phone number.
Frequently Asked Questions
To install Facebook Pixel on your Landing Page (LadiPage), you just need to follow a few simple steps. First, you need to copy the Pixel code from your Facebook Business Manager account. Then, access the LadiPage admin section, select Settings and find the Insert Tracking Code or HTML/JavaScript section. Paste the Pixel code into the required box, making sure the code is inserted in the correct position before the closing tag. After saving, Facebook Pixel will work on your Landing Page, helping to track and optimize conversions from advertising campaigns.
Facebook Pixel Helper is a Google Chrome browser extension that helps test and verify the installation of Facebook Pixel on websites. When installed on the browser, Facebook Pixel Helper will automatically detect active Pixel codes on the websites you visit and display information about the Pixel events that have been set up. This tool is very useful for advertisers and web developers, helping to ensure that the Pixel is installed correctly and tracking conversions properly, thereby optimizing the effectiveness of Facebook advertising campaigns.