How to add an agency to Facebook Business Manager

Are you looking to explore Facebook Business Manager? How to add an agency to Facebook Business Manager? In this article, RentFB will provide a detailed guide on how to use Business Manager safely, including managing websites, ad accounts, admin access, and more.
When should I add an agency to Facebook Business Manager?
When should you add an agency to Facebook Business Manager? This typically happens when your business wants to partner with a third party or a marketing or advertising agency to professionally manage your ad campaigns, accounts, or pages. Adding an agency to Business Manager makes it easy to delegate management, monitoring, and control of your advertising activities without sharing individual access or having to directly manage each and every small task. When you add an agency, you give them permission to manage your ads and pages, allowing them to easily run marketing campaigns, optimize ads, or track ad performance without disrupting your other operations. This is especially necessary if you are running multiple ad campaigns at the same time and want a professional team to manage them for you.
Adding an agency to your Business Manager also helps keep your information safe. You don’t have to provide personal login information or share direct access to your account. This helps reduce security risks and protects your business information. When you no longer work with an agency, you can easily revoke their access without worrying about impacting other Facebook business assets. Adding an agency to your Facebook Business Manager is an important step in effectively managing your ad campaigns and protecting your business information, especially when you need support from professional third parties.
How to add an agency to Facebook Business Manager
If you are a business partnering with an agency or consultant, adding them to your Meta Business Manager business profile is an important step. This not only allows you to share your business assets, but also allows your partner to manage them effectively. Here is a step-by-step guide on how to do this, along with what you need to do before you get started.
- Business Profile Control: You must have full control over your business profile. This means you must be the primary administrator of the profile.
- Partners need a business profile: Your partners also need to have a business profile. If they don’t have one, ask them to create a business profile on Meta before adding them.
- Partner’s Business ID: You’ll need your partner’s business ID to complete the process of adding them to your business profile.

Agent authorization guide
Here are the specific steps to add a partner to your business profile in Business Manager:
- Step 1: First, you need to log in to Business Manager on Meta and navigate to the “Business Settings” section.
- Step 2: Look for “Users” in the left menu and click “Partners”. This is where you can manage the partners you want to add to your business profile.
- Step 3: Click the “Add” button and select “Give partners access to your properties”. This will allow you to begin the process of adding partners to your business profile.
- Step 4: A new window will appear, asking you to enter your partner’s business ID. Once entered, click “Next”.
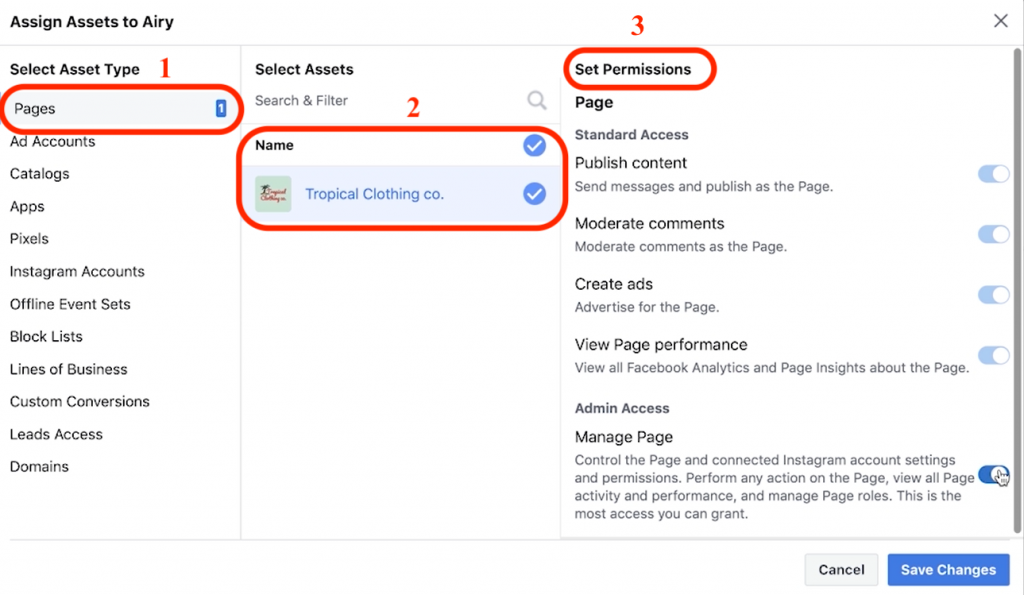
- Step 5: You will see a list of your business assets. Select the assets you want to assign to your partner. For each asset, you will need to specify the level of access you want to give them, which can be full control or partial access. If you are assigning partial access, select the tasks you want your partner to perform.
- Step 6: Click “Save Changes” to complete the partner addition process. Once complete, your partner will be able to see the business assets you assigned to them in their business profile.
Adding a partner to your business profile in Meta Business Manager not only enhances collaboration but also optimizes the management of your business assets. Your partner will be able to access and perform necessary tasks without compromising your privacy, facilitating the growth of both your businesses.
Why use Facebook Ads Manager?
The first reason you should use Business Manager is because it makes it easier to manage your business. When you log in to Business Manager, you’ll be taken directly to all of your Facebook business properties. This makes it easy to access your Pages, Ads Manager, and other relevant business content without having to scroll through your personal news feed or irrelevant notifications.
The second reason is that Business Manager helps keep things efficient and secure. If you manage multiple Facebook pages, ad accounts, or assets for both yourself and your clients, switching back and forth between them can be complicated and time-consuming. Managing access for you and others can be especially difficult. With Business Manager, you can easily see all of your pages, ad accounts, and the roles each person has. This is useful when you need to revoke access to employees who are no longer working for you. Instead of going through each page to remove access, you can simply go to the “People” section of Business Manager and revoke their access to all of your assets with one click.
Furthermore, with Business Manager, you don’t need to be Facebook friends with employees or designees to manage your pages and ad accounts. You can simply assign their roles through Business Manager. This ensures that they won’t be able to see your personal profile and vice versa, helping to protect the privacy of both parties.
Hopefully the information we share can help you in granting administrative rights to agents in Facebook Business Manager.
Contact Info
Information about “How to add an agency to Facebook Business Manager” hopes to provide you with additional necessary knowledge. At Rent FB, there is a team of highly qualified and experienced staff and experts who will provide rent facebook ad account as well as support when you run Facebook ads. Contact us via phone number.
Frequently Asked Questions
Adding Facebook page admin rights in Meta Business Suite is an important step to effectively managing your page, especially if you’re working with a team or partner. To do this, you’ll need to go to Meta Business Suite, go to “Settings,” then select “Manage Permissions,” and add the people you want to assign admin rights to. You can customize the level of access, such as admin, editor, or advertiser, to help ensure everyone can perform the right tasks without compromising the privacy or security of your page.
Adding admin rights to a Facebook page makes it easier for businesses or individuals to delegate tasks and manage the page more effectively. The advantage of adding admins is that the person granted permission can edit page information, manage posts and ads, and respond to messages and comments. This helps share responsibility, reducing the workload for the main manager. However, the disadvantage is that if not carefully controlled, the person granted permission can change the admin rights of others or affect the page, leading to ownership and security risks.