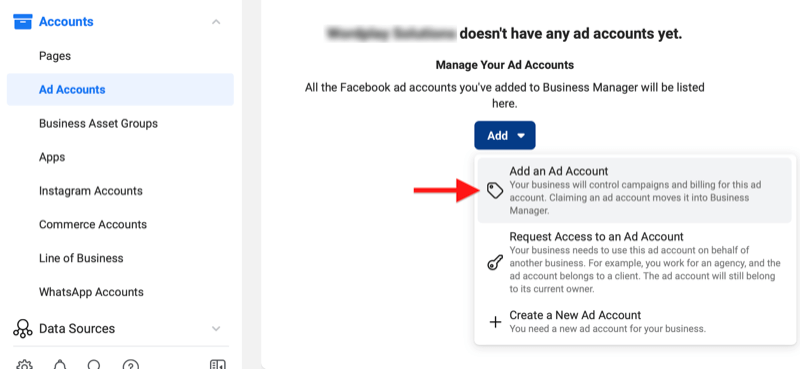
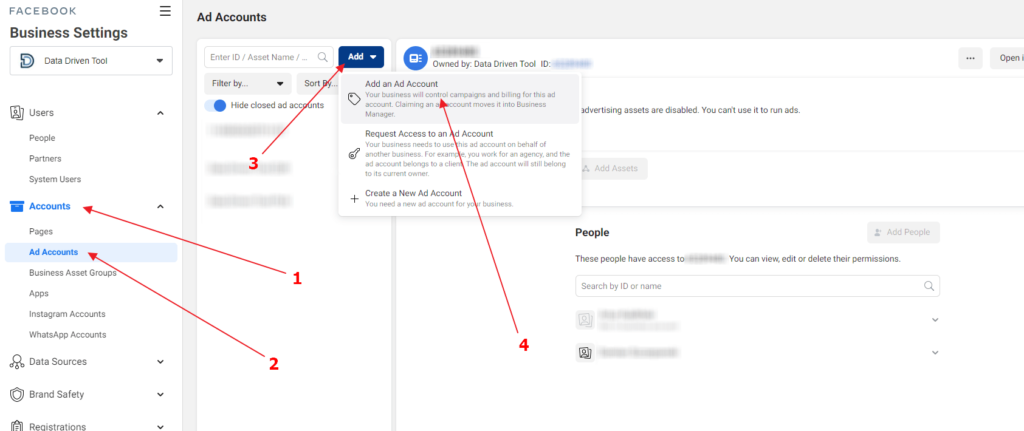
How to Add an Account to Business Manager

Each Facebook advertising account is linked to a personal account (usually called Via). However, to manage effectively and reduce risks if a personal account has problems, an advertising account can be shared with many different Vias. Let’s explore how to add an account to business manager with RentFb in the content below!
Facebook business manager overview
Facebook Business, also known as Facebook for Business, is a powerful business management tool for advertisers and businesses that want to optimize their marketing efforts on the Facebook platform. With Facebook Business, you can manage all your marketing and advertising activities easily and efficiently, centralizing all your tools in one place. This allows you to share access and management with your team, partner agencies, or vendors in a flexible and secure way. One of the most powerful features of Facebook Business is the ability to create and manage multiple assets for your business. You can manage company fan pages, Instagram accounts, customer lists, and product catalogs, all within the same platform. This saves you time and effort when managing multiple accounts and advertising assets.
Facebook Business also provides the ability to control user access, from those working on advertising accounts, fanpage managers to community groups. You can clearly assign permissions to each person, ensuring that each employee only has access to the information and tools necessary for their work. This helps to increase the security and organization of business operations. In addition, Facebook Business also allows you to track ads on both Facebook and Instagram from overview to detail, helping you easily grasp the effectiveness of advertising campaigns. You can also control the spending budget of these campaigns, adjust the budget to suit your business goals and ensure that your advertising strategy always achieves optimal results.
How to add an account to business manager on Facebook
Adding users to your Meta business profile makes it easier to manage your business assets and assign exactly the permissions you need. Here’s a step-by-step guide:
- Step 1: First, log in to your Business Manager account. On the main interface, navigate to Business Settings. This is where you can manage all your assets and user access.
- Step 2: Under Users, find and click the People tab. This is where you’ll see a list of individuals who have been granted access to your business profile.
- Step 3: Here, you will see an Invite People option. Click on this option to start the process of adding new users.
- Step 4: A dialog box will appear, asking you to enter the email address of the person you want to invite to your business profile. Fill in the email correctly to ensure the person receives the invitation. Once completed, click Next.
- Step 5: Next, you will be asked to choose the type of access you want to assign to the user. There are many types of access, from full administrative access to limited access. Choose the appropriate permission based on their role and responsibilities in the business, then click Next.
- Step 6: In this step, you will need to select the specific assets that the user will have access to, such as advertising accounts, fan pages, or other business tools. If you only want to grant partial access, assign specific permissions based on the tasks they need to perform. This will give you more control over their activities. Once done, click Invite.
- Step 7: Before sending the invitation, you will see a summary of the user information, access, and assets granted. Double check to make sure everything is correct. When ready, click Send Request. The invitee will receive a notification email with detailed instructions for joining your business profile.
- Step 8: Once the invitation is sent, the user will need to accept the email invitation and complete the process of joining the business profile. Note that it may take a few days for them to be fully enabled to use all the features in the business profile.

Instructions for adding people to your business profile on Meta Business Suite
To invite people to your business profile in Meta Business Suite or Business Manager, you can follow these steps. Note that Meta is currently upgrading Business Settings in Business Manager, so you may be redirected to Settings in Meta Business Suite, which has similar but more powerful features. However, if you still want to use Business Settings in Business Manager, simply click the Business Manager tab in Settings.
- Step 1: First, you need to log in to Meta Business Suite and navigate to the Settings section in your management interface.
- Step 2: In Settings, find the “People” tab and click on it. You will then see an option to “Add People.” Click on this to start the invitation process.
- Step 3: Next, you will need to enter the email address of the person you want to invite to your business profile. Additionally, if you need to, you can also enable one of the advanced options like Temporary Access or Access to Meta Spark. Once you have filled in all the information, click “Next.”
- Step 4: After entering the email address, you will be asked to select the type of access you want to assign to that person. Depending on their role and job in the business, you can choose the appropriate access such as administrator, editor, or other permissions. After selecting the access, click “Next.”
- Step 5: In this step, you need to choose the assets that the person will have access to, such as your ad account, Facebook page, Instagram, or other business assets. You can assign full access or partial access, depending on the tasks the person needs to perform. This choice allows you to control exactly what the person can do. Once you have made your selections, click “Next.”
- Step 6: You will see a summary of the invitation. Double-check all the information and access you have selected. If everything is correct, click “Send Invitation.” The person will receive an email inviting them to join your business profile and can start accessing the properties you have specified.
That’s it! You’ve completed the process of inviting new people to your business profile in Meta Business Suite.
This process makes it easy to manage access and ensure that your Meta business assets are used efficiently and securely. Follow each step carefully to ensure that new users can quickly support your business. We wish you success in implementing the steps we share!
Contact Info
You need a Facebook advertising account but don’t know any reputable provider. Coming to
Rentfb is where you will experience what you need facebook ads cryptocurrency prestige, high trust, and professional consulting and service support for customers.
Frequently Asked Questions
To add BM to your personal Facebook account (Via), you need to follow these steps: Log in to the Facebook account that has BM management rights, then go to Business Manager. Here, go to Business Settings, select Users and click People. Next, select Add People and enter the email of the Via you want to add. Then, assign the appropriate role, such as admin or staff, and click Invite. Via will receive an email or a notification on Facebook to accept the invitation and connect to BM. Once completed, the Via account will be linked and will be able to manage assets in BM according to the assigned rights.
To create a Facebook business advertising account, you need to access the Meta Business Manager and follow these steps:
Log in to your Meta Business Suite account.
In the main interface, select Business Settings and navigate to the Ad Accounts section.
Click Add and select Create a new ad account.
Enter the appropriate account name, time zone, currency, then click Next.
Assign this account to your business and grant access to team members.
Confirm the information and click Create Account to finish.
Once the account is created, you can start setting up ad campaigns, tracking performance, and managing budgets easily.