How to add shop on Facebook page

Setting up a store on Facebook is an effective way to bring your products closer to more potential customers. So how to add shop on Facebook page and attract customers’ attention on Facebook? Let’s explore with RentFB the detailed steps to add a store on Facebook!
What are the requirements to add a store on a Facebook page?
To create a store on your Facebook fan page and start selling effectively, you need to meet some important conditions. Below are the requirements to ensure that you can set up your store smoothly and comply with Facebook standards:
- Authenticate your identity and store information: To build a solid sales platform, you need to authenticate your identity or provide accurate store-related information. This helps build trust with customers and ensures that your store operates in a transparent and professional manner.
- Comply with Facebook’s rules and policies: Strictly following Facebook’s rules and policies is a prerequisite for you to be able to create a store on your fanpage. Facebook has specific regulations on setting up stores, selling, advertising, and handling customer information. Make sure you understand and follow these policies to avoid possible problems.
- Verify your domain if you use your own website: If you use a separate website to direct customers from Facebook, you need to verify your domain. This helps ensure that your domain is correctly connected to your Facebook store and helps Facebook confirm the validity of the website you use.
- Located in an accepted area: You need to make sure that your store is located in an area that Facebook Shops accepts. Facebook has location and service area requirements to ensure that your store can operate and serve customers in the specific area you’ve selected.
- Transparency in product information: To ensure customers have the best shopping experience, you need to be transparent in providing information about product status, price, return and refund policies. Clarity and detail in this information helps customers make purchasing decisions easily and creates trust in your store.

Meeting these requirements will help you set up a store on your Facebook fanpage effectively and successfully, while creating favorable conditions to attract and serve customers best.
How to add shop on Facebook page
To set up a shop on Facebook, you need to take a few basic steps to make sure your shop is set up correctly and effectively. Here is a step-by-step guide to help you easily set up your shop:
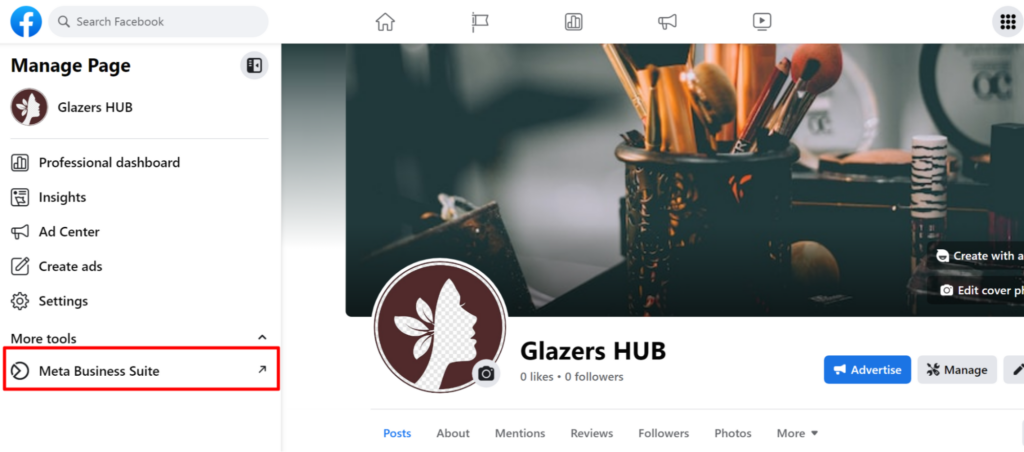
Step 1: The first step is to access Facebook Business Manager. From the main interface of Business Manager, find and open the “Store Locations” section.
Step 2: In the top menu, select the Facebook Page you want to link to your new store. Make sure this Page is set up and working properly before adding your store.
Step 3: Under the Manage Store Details section, you will see the option “+ Add Store.” Click on it to start the process of creating a new store.
Step 4: Follow the instructions to add details for your store. You’ll need to provide information about each of your business’s physical locations, such as the store’s address and name. Each store will have its own Page, named after your main Page and with a specific location. There are four ways to add a location:
- Add manually: Use the template to add each store and address manually. This method is suitable if you have less than 10 stores.
- Add multiple stores at once: Use a spreadsheet template to add multiple stores at once. This method is a good option if you have more than 10 stores to set up.
- Connect Pages: If you already have separate Pages for several stores, connect them to your main Page to import store details. This saves time and makes it easier to manage multiple locations.
- Connect via API: Use the API to automatically add store details. This is a good option for developers or businesses with more complex integration needs.
Step 5: Once you have finished setting up your stores, you can click the “Download Stores” button to download an Excel spreadsheet containing your store information. You can share this spreadsheet with your team to manage and review the information.
Step 6: If you need to add or edit locations after creating your store, return to the “Store Locations” section, click “+ Add Store” and follow the same steps as above.
Step 7: Once set up, the default name for your Store Page will be your Main Page name plus a location description. For example, if your Main Page is called “Jasper’s Market,” your Store Pages might be called “Jasper’s Market (Dallas)” or “Jasper’s Market (510 Main St., Dallas).” You can change your Store Page name and create a username in Page Settings to better match your branding.
By following the above steps, you will be able to effectively set up and manage stores on your Facebook fanpage, thereby attracting customers and enhancing your business’s online presence.

Adding a store on your Facebook page brings many practical benefits.
If you are running an online business, creating a Facebook store can bring many practical benefits to your business. First, it helps you introduce your products to a wide range of potential customers and increase your brand visibility. But there are other important benefits to creating a Facebook store:
- Increase local discoverability: When you set up a shop on your fan page, you make it easier for people to find your business in their geographic area. This is especially important if you sell products or services that serve local needs.
- Offer local and personalized content: Facebook Shops allow you to offer local and personalized content that is relevant to the needs and interests of customers in different areas. This helps you customize the customer experience and makes your products more appealing to each audience.
- Centralized Store Management: One of the biggest benefits of creating a Facebook store is the ability to manage all of your store details in one convenient place. You can easily update product information, pricing, promotions, and other relevant information.
- Aggregate check-ins: You can aggregate and track customer check-ins on your store’s main page. This not only helps you track customer interactions, but also gives you valuable insights into how customers interact with your business.
- Create store traffic ads: With store traffic ads, you can show your ads to people within a specific area around your store. This helps you drive customers to your store more effectively.
- Support for Facebook and Instagram search: Finally, creating a Facebook store allows you to leverage Facebook and Instagram search to help customers find stores near them. This not only increases your reach, but also makes it easier for you to connect with potential customers in your area.
The above article has guided you on how to quickly create a store on your Facebook page. Wish you set up an effective store and have a smooth business process.
Contact Info
Are you in need of Facebook advertising or need to rent a quality Facebook advertising account? Don’t worry! Rentfb is a unit specializing in providing reputable Facebook accounts, as well as direct advertising support. Provides all types of advertising accounts such as casino facebook ads to help you reach and create fast conversions.
Frequently Asked Questions
Việc không thể tạo cửa hàng trên Fanpage có thể do nhiều lý do khác nhau. Có thể bạn chưa chứng thực danh tính hoặc thông tin liên quan đến cửa hàng của mình, hoặc không tuân thủ các quy định và chính sách của Facebook. Ngoài ra, nếu bạn không thực hiện xác minh tên miền khi sử dụng website riêng hoặc nếu cửa hàng của bạn nằm ngoài khu vực được Facebook Shop chấp nhận, bạn cũng sẽ gặp khó khăn trong việc thiết lập cửa hàng. Đảm bảo rằng bạn cung cấp thông tin đầy đủ và minh bạch về tình trạng hàng hóa, giá cả, và chính sách đổi trả để tránh gặp phải những vấn đề này.
Để tạo cửa hàng trên Fanpage bằng điện thoại, đầu tiên, mở ứng dụng Facebook và truy cập vào Trang của bạn. Sau đó, nhấn vào biểu tượng menu và chọn “Cửa hàng”. Tiếp theo, bạn sẽ được hướng dẫn qua các bước thiết lập, bao gồm việc thêm thông tin về cửa hàng, sản phẩm và chính sách bán hàng. Bạn có thể chụp ảnh sản phẩm trực tiếp từ điện thoại và nhập các chi tiết cần thiết. Cuối cùng, sau khi hoàn tất việc điền thông tin và thiết lập cửa hàng, hãy nhấn “Lưu” để công khai cửa hàng của bạn trên Fanpage.